Windows 10 Mail
-
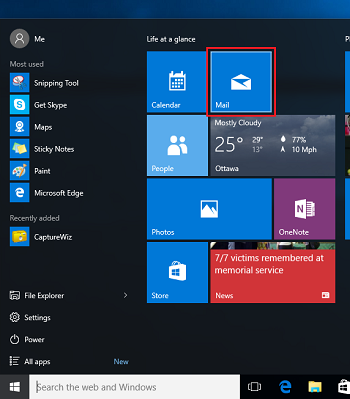
Click the Start button and select Mail.
-
Start the Add Account wizard depending on which screen you are on:
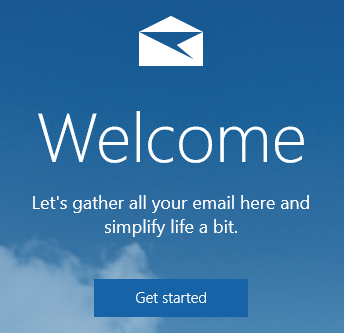
- If opening Mail for the first time, a Welcome screen will appear:
-
Click Get Started.
Note:
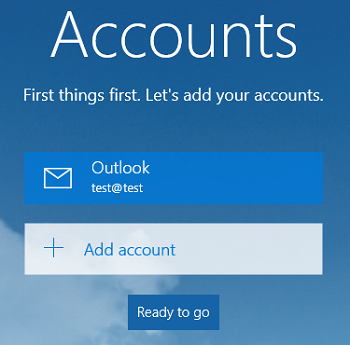
Possible for accounts to be listed already (e.g. Computer associated with a Microsoft Account).
-
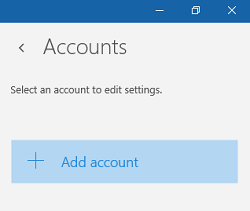
Click Add Account.
-
- If you are in the regular Mail screen, access account settings:
-
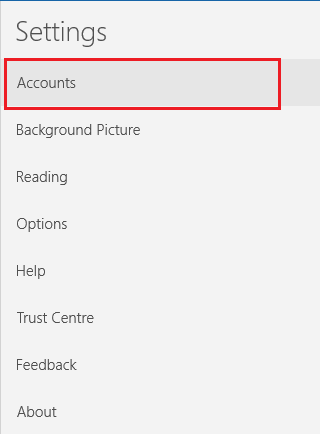
Click the Gear symbol in the bottom left corner of the window.

-
Click the Accounts option that appears on the right side of the screen.
-
Click Add Account.
-
- If opening Mail for the first time, a Welcome screen will appear:
-
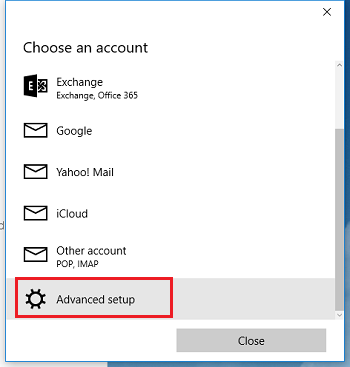
Click Advanced setup.
-
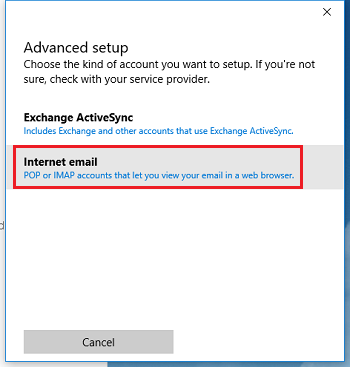
Click Internet email.
-
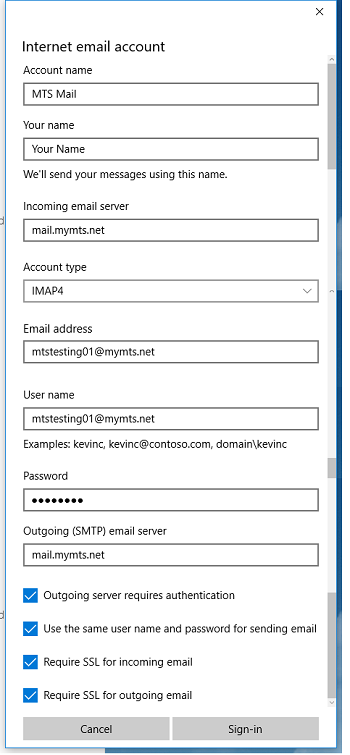
Enter:
-
Account name: Name displayed when viewing account list.
-
Your name: Name to be displayed on outgoing emails.
-
Incoming email server: mail.mymts.net
-
Account Type: IMAP4
-
Email Address: Your Bell MTS email address or alias (e.g. @mymts.net, @mts.net, @mtsmail.ca) to be displayed on your outgoing emails.
-
Username: Your @mymts.net email address (e.g. username@mymts.net).
- Password: Your Email password.
- Outgoing (SMTP) email server: mail.mymts.net
- Make sure all four checkboxes are checked:
- Outgoing server requires authentication.
- Use the same username and password for sending email.
- Require SSL for incoming email.
- Require SSL for outgoing email.
-
-
Click Sign-in.
-
Click Done to complete setup.
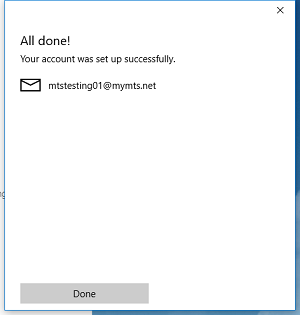
Your email program will start receiving emails.